Monthly Archives: June 2013

A using clause inside a namespace is different to a using clause outside a namespace

For some reason I always forget the difference between using a using clause inside a namespace as opposed to outside. Occasionally I come across other people’s code where they’ve obviously explicitly copied their using clauses inside their namespace, being that by default creating a new C# file will place the default using clauses at the top of the file (outside the namespace).

So what’s the difference ?

If we have a class sitting in a namespace such as MyNamespace.MyClasses (with using System; outside the namespace) such as

using System;

namespace MyNamespace.MyClasses
{
   class MyClass
   {
      void MyMethod()
      {
         String s = String.Empty;
         // do something
      }
   }
}

It’s happily using the System.String object, but then along comes a new developer on the project who creates a String class specific to the project.

So the new class is added to the MyNamespace namespace in the following way

namespace MyNamespace
{
   class String
   {
   }
}

At this point our previous code will fail with a ‘MyNamespace.String’ does not contain a definition for ‘Empty’. This is because when the compiler searches for the String class it starts in the MyNamespace.MyClasses namespace then the MyNamespace namespace and then finally the using clauses outside of the namespace. So in this instance it finds a matching String class in the namespace MyNamespace and unless the String is fully qualified (i.e. System.String s = System.String.Empty; will try to use this. Obviously this is the wrong String class.

If we move the using System; inside the namespace of MyClass, such as

namespace MyNamespace.MyClasses
{
   using System;
   
   class MyClass
   {
      void MyMethod()
      {
         String s = String.Empty;
      }
   }
}

In this instance the compiler searches the MyNamespace.MyClasses namespace and then the using clauses within that namespace and so can resolve the String.Empty const and the newly added String class can still be implemented without being mistakenly used.
JavaScript – Encapsulation

In JavaScript everything is an object from the obvious, such as arrays, strings etc. through to functions.

So how do we handle encapsulation such that we will have private and public data and methods ?

Well, because functions are themselves objects we can declare private data internally (within the function) and then using the prototype property we can add methods to the function that are public.

Below is a very simple example of encapsulation. The variable balance is private as it’s declared within the scope of the BankAccount function.

function BankAccount() {
   var balance = 0;

   BankAccount.prototype.add = function(amount) {
      balance += amount;
   }

   BankAccount.prototype.subtract = function(amount) {
      balance -= amount;
   }

   BankAccount.prototype.getBalance = function() {
      return balance;
   }
};

The functions add, subtract and getBalance are public and thus we can interact with this object using the following

var bankAccount = new BankAccount();
bankAccount.add(100);
bankAccount.subtract(10);

var current = bankAccount.getBalance();

If we wanted to make the balance variable public, we could simply alter the var balance = 0 to this.balance = 0 but of course this allows us to change the balance variable without going through the add/subtract methods.

To implement a more property like variable (as per C# for example) whereby we have methods to get/set the property we might look to implement something like

function BankAccount() {
   var balance = 0;

   this.__defineSetter__("balance", function(x) {});
   this.__defineGetter__("balance", function() { return balance; });
   
   // rest of the methods as before
};

Here we define a getter such that we can access in this way bankAccount.balance but we’ve defined a setter that does nothing so whilst a setter exists it doesn’t alter the balance.

JavaScript Refresher – Properties, Methods and Types

Properties and Methods

JavaScript is a dynamic language. We do not need to declare properties or methods on an object prior to using them, for example the following will automatically add a new property and method to an object

var o = new Object();
o.Message = "Clicked";
o.Clicked = function() {
   alert(this.Message);
}

So in the above code we create an instance of an Object and then by calling o.Message we basically add a new property to the object o. Next we create a method on the object. Note: We need to use “this” to access the property from within the method otherwise the code tries to access an undefined variable.

We can actually add properties and methods as well as access them using indexer notation, for example

var o = new Object();
o["Message"] = "Hello";

and this allows us to even call methods dynamically such as

var clicked = "Clicked";

var o = new Object();
   o["Message"] = "Clicked";
   o["Clicked"] = function() {
      alert(this["Message"]);
   }


   o[clicked]();

So in the above we can dynamically change the method called (assuming we had more than one method).

We can also iterate over the members of an object using the following

var o = new Object();
   o["Message"] = "Clicked";
   o["Clicked"] = function() {
      var s = "";
      // iterate over the object
      for(var p in o)
      {
         s = s + p + ";"
      }
      alert(s);
   }

Using the for..in loop we simply iterate over and object, the string “s” will be “Message;Clicked”.

Finally, we can add properties and methods, but we can also delete them using

delete o.Message;

This deletes the Message property from the object o.

Types

JavaScript is loosely types. We declare variables using the var keyword and a variable can change type at any time, for example

var tmp = 3.1415926;
tmp = "Hello";

The runtime will not complain about the type conversion from a floating point number to a string.

JavaScript has a small number of types which include, string, number, boolean, array and object.

  • A string may be declared using either double quotes or single quotes, obviously this helps when the string is declare inline.
  • A number can be declared with or without decimal places (in other words it can be floating point or an integer).
  • A boolean may be true or false (as one would expect)
  • An array can be declared in various ways (described later) and can store heterogeneous data types
  • An object can be declared and properties and methods assigned to it (see above)

If a var is not assigned a value it is “undefined” (which is itself a type), basically this is a variable that has no value, but we can also use null to denote an “empty” value.

Declaring Arrays

Arrays can be declared in various ways, for the first example we declare an array and then we dynamically add items by creating an index to them

var vowels = new Array();
vowels[0] = "a";
vowels[1] = "e";
vowels[2] = "i";
vowels[3] = "o";
vowels[4] = "u";

A couple of alternatives are

var vowels1 = new Array("a", "e", "i", "o", "u");
var vowels2 = ["a", "e", "i", "o", "u"];

JavaScript Refresher – Using JavaScript in HTML

How to use JavaScript in an HTML file

JavaScript is a dynamic loosely typed language which is now the lingua franca of the browser now.

We can add JavaScript to a web page as inline, embedded or in an external .js file. For example

Inline

<input type="button" value="Click Me!" onClick="alert('Clicked');" />

In the above the inline JavaScript will display an alter in response to the button being clicked.

Embedded

The same code as above but with the JavaScript embedded would look more like

<script>
function clicked() {
   alert('Clicked');
}
</script>

<input type="button" value="Click Me!" onClick="clicked();" />

I’ve removed superfluous code but the usual place to put the script is in the section.

External File

If we have a file name (for example) scripts.js then we’d place the scripting code in that file as below

function clicked() {
   alert('Clicked');
}

and in the of the HTML file we’d have the reference to the script

<script type="text/javascript" language="javascript" src="scripts.js"></script>

MSMQ

Funnily enough I’ve never used MSMQ in a project having spent most of my time using TIB RV and ActiveMQ, but time to change that. This is a quick start to getting up and running with the key parts of MSMQ.

First off, to use MSMQ from a .NET project add a reference to System.Messaging.

Create a queue

To create a queue programatically use the following (this sample creates a private queue named test)

const string QUEUE_NAME = @".\private$\Test";

if(!MessageQueue.Exists(QUEUE_NAME))
{
   MessageQueue.Create(QUEUE_NAME);
}

Note: If you try to create the queue when it already exists you will get a MessageQueueException – A queue with the same path name already exists. Hence the use of the MessageQueue.Exists method.

Deleting a queue

To delete the queue we’ve just created we can use the following

const string QUEUE_NAME = @".\private$\Test";

if(MessageQueue.Exists(QUEUE_NAME))
{
   MessageQueue.Delete(QUEUE_NAME);
}

Note: If you try to delete a queue that does not exist, you’ll get a MessageQueueException – The queue does not exist or you do not have sufficient permissions to perform the operation. Hence the use of the MessageQueue.Exists method.

Sending a message

// we'll assume the queue exists, so won't repeat creation of it
MessageQueue messageQueue = new MessageQueue(QUEUE_NAME);
messageQueue.Formatter = new XmlMessageFormatter(new[] { typeof(string) });

messageQueue.Send(new Message("Hello MSMQ World");

Note: Without the formatter any attempt to recive this message will fail with a “Cannot find a formatter capable of reading this message” exception.

Receiving a message

Note: MSMQ does not have an event or callback receive method. A call to Receive will block the current thread.

// we'll assume the queue exists, so won't repeat creation of it
MessageQueue messageQueue = new MessageQueue(QUEUE_NAME);
messageQueue.Formatter = new XmlMessageFormatter(new[] { typeof(string) });

Message msg = messageQueue.Receive();
Console.WriteLine(msg.Body);

As per the sending message sample, we need to set the formatter so we can deserialize the message body. As stated, Receive will block the current thread. We can place a timeout on the Receive call if we want to return control to the thread after an amount of time or simply block (in which case we’d be best running the Receive code from a separate task/thread.

Queue paths/names

The queue path is made up of the machine name (or . for local machine) then a backslash followed by a path to the queue (see MessageQueue Constructor for a full explanation).

I’ve shown the basic format below (as well)

[table “” not found /]

Creating and Deleting Queues via the UI

Finally for this post, I’ll conclude with the steps to admin. your MSMQ queues from the MMC snap-in UI.

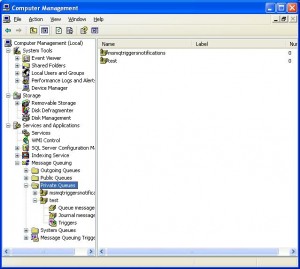
In Windows XP (yes some companies still run XP). From the control panel select Administrative Tools then run the Computer Management applet. Assuming you have MSMQ installed you should see something like the screen shot below

msmq-applet

Right mouse clicking on the folders Private Queues etc. will offer an option to create a new queue and bringing the context menu up on the queue name allows us to delete a queue.

The C in CSS

CSS (Cascading style sheets) can appear in various ways. Inline, embedded, part of a style section and so on. The order in which they “cascade” – in other words the order in which the browser uses the styles is very specific.

The order is shown below.

Inline

The inline style takes precedence over all other style mechanisms. An inline style is simply a style applied to an elements style attribute, for example

<p style="color:red">A red paragraph</p>

Embedded

If no inline style is found for an element then the browser looks for an embedded style. We embed a style within style element, as below

<head>
   <style>
      p { color:red }
   </style>
</head>

External

After the embedded style the browser looks for any external styles found via the link element.

<head>
   <link rel="stylesheet" type="text/css" href="theme.css">
</head>

Theme.css

p { color:red }

User

If none of the previous mechanisms yields a matching style the browser checks the user styles. These are styles defined for a specific user on their machine. Each browser has it’s own way of allowing a user to define their “user” styles. In Google Chrome there’s a file in the user profile, for example C:\Documents and Settings\\Local Settings\Application Data\Google\Chrome\User Data\Default\User StyleSheets\Custom.css

Browser

Finally if no match is found for any of the above, the browser uses it’s default settings for the style.

!Important

Along with the above the user can mark a style as important

<style>
   p { color:red !important}
</style>

In such situations where a property is marked with !important the browser will now give preference to these important properties. In essence the order of precedence of the !important properties are reversed, therefore user style sheet has higher !important precedence than an author supplied !important value.

Note: The Inline, embedded and separate stylesheet are collectively known as the author style sheets.